Wednesday, November 30, 2011

{Sewing} Class, Part 1

I was asked several weeks ago by someone if I would teach her and her daughter to sew. I’ve been asked this question many times, but no one has been really serious about it. They have just never pulled the trigger on actually doing it. Until NOW! Boy, was I excited! I will blog about each session, so you can follow their/our progress. I have teaching experience, just not in sewing! I’m blessed to have a pair of students who understand this and are willing to give it a shot!

I decided to do a project-based series of classes, using Deborah Moebe’s book, Stitch by Stitch. We’re not working on every project in the book, but it gave me a jumping off point to make sure I teach most of the basic sewing skills. My students having the book will also give them a wonderful reference to look back on when they are not in my classroom dining room. 

During the first session, we reviewed the project/supply list, winding a bobbin, threading the machine, sewing a straight line and backstitching. I almost left out the project/supply list overview, but I am very very glad I didn’t. Why? Because this mom & daughter were not familiar with any sewing items. I’m not sure why I think everyone knows what I seam ripper/seam gauge/etc. is! They found it very helpful that I brought out my supplies and tools to show them exactly what I was talking about. I suppose it worked because they bought all the right things...and came back for session two. :)

Tuesday, November 29, 2011

Shopping Small { I'm Featured! }

With Black Friday, Small Business Saturday and Cyber Monday already under our belts, there are only 26 days left to finish your Christmas shopping! Yikes! Personally, for me, this year has flown by. I’ve been looking forward to the Christmas season because I love giving unique, one of a kind items that my friends and loved ones treasure.

I also love to help {YOU} give unique items! It fills my heart up to hear that the items I have created found such wonderful homes. It makes what I do worthwhile.

Today, my new friend Stef has featured me on her blog! It’s Shop Small Tuesday over there and she is featuring my shop!

Stef and I just “met” through Twitter about two weeks ago,and we have a lot in common! She homeschools just like I do! So head on over and check out her blog!

Also, over at Overcoming Busy, is a good list of why Shopping Small is a great idea!

Sunday, November 27, 2011

Pinterest Wish List for Kids

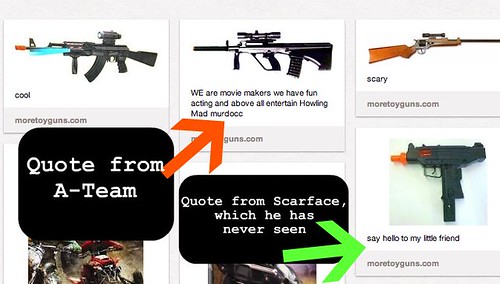
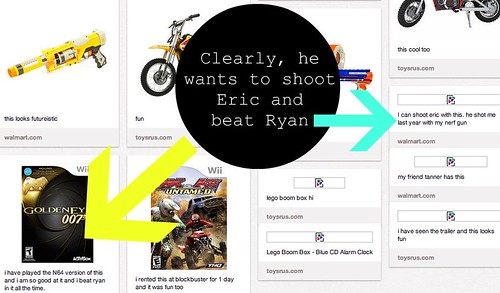
My husband had the greatest idea ever. He set up a Pinterest page for Kendall (our 10 year old boy) and allowed him to start pinning things that he wants for Christmas and his birthday. His list consists of Nerf & other toy guns and video games. It's not only helpful, it's entertaining! Check out these captions. They were too funny to keep to myself.

Screen shot 2011-11-26 at 3.50.31 PM
Poor Ryan & Eric. They don't know what they're in for. They deserve it. (They are my little brothers!) ***Evil laugh***
Screen shot 2011-11-26 at 3.50.35 PM

Saturday, November 26, 2011

Christmas Napkins for My Mom

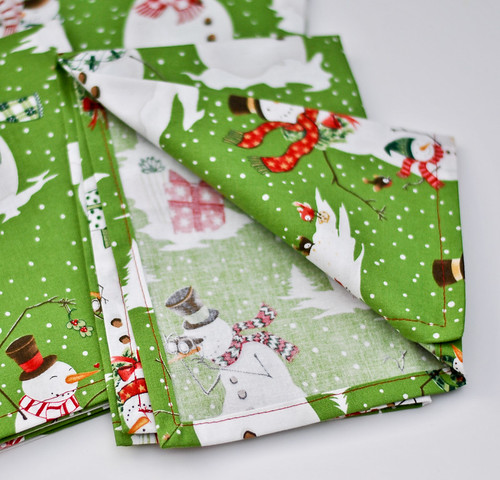
I've been in quite the festive mood lately. Our trees are already up, stockings are hung (even though I have plans to make new ones) and I've sewn some napkins for my mom with some Christmas fabric she bought last year. She never decided what she wanted me to make out of it, so I made the executive decision for her! I hope she appreciates my assertiveness.

2011 11 26 Christmas Napkins-1
Just look at those sweet snowmen. They say "wipe your mouth on me!"
2011 11 26 Christmas Napkins-2
Yep, these are fancy napkins will fully mitered corners!

Sunday, November 13, 2011

A Marti Bag for My Mom

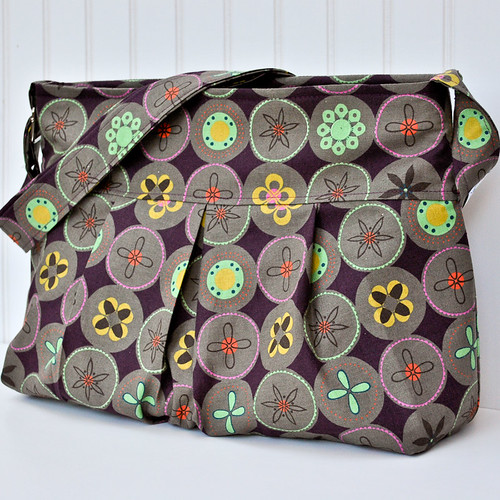
Last week I made my mom her third Marti Bag of this type. Her Marti Bags have a boxy bottom, which I altered the pattern to fit this need. I like the boxy bottom better than the regular bags that are in my shop.

The fabric is that of local fabric designer Melody Miller. Her line Ruby Star Spring is made of light linen (from Kokka) and comes on a 62” wide bolt! Whoo hoo! I really enjoyed sewing with this fabric.

I never would have known about Melody had the chance meeting of her friend Allison! I would be missing out! Apparently Allison’s kids and my kid get their haircuts at the same place (Pigtails & Crewcuts, if you’re interested) and we were all there at the same time. Allison complimented my bag I was carrying and I told her I made it, that I have a sewing business, etc. She then told me about how she and her friend Melody were working on a new fabric line and I went home to check it out! Turns out, also, that Allison homeschools her kids, so we are two peas in a pod...homeschooling, fabric-loving moms who take their kids to the best haircut place for kids. Ok, it’s the only kid-specific haircut place here locally.

Anyway, here’s the bag:
2011 11 10 Marti Bag for Mom


It has two rows of pockets on the inside (6 total), a magnetic snap, and a key fob! The strap is adjustable from about 24” to 50”. Whoo hoo! She loved it!

Friday, November 11, 2011

Pricing: What goes into an item?

Oodles of blog posts, written by other people, exhaust the topic of pricing in the handmade industry, so I don’t plan on making this a long post. My goal in this post is to show you what goes into making an apron, my best-selling item.

Step 1: Cut out the fabric. 5 minutes
  • An apron is 6 pieces: Two neck straps, two waist ties, a pocket and the apron body.
Step 2: Prepare neck straps & waist ties. 10 minutes
  • Fold under one short end of each strap & tie, press
  • Then fold each piece in half twice, press both times
  • Attach velcro to neck straps
  • Sew neck straps & waist ties
  • Add tag to one waist tie
Step 3: 5 minutes
  • Finish all raw edges of apron and pocket with the serger, adding the straps in their appropriate places.
Step 4: 15 minutes
  • Prepare apron & pocket for hemming. This means I stand behind my hot iron, turning up each finished edge to form a straight hem. I also miter the corners that can be mitered. 
Step 5: 10 minutes
  • Topstitch along the top edge of the pocket.
  • Place & pin the pocket in the appropriate location on apron.
  • Sew pocket down.
  • Hem apron along all the edges I pressed down.
  • Fold nicely and put finished apron in my stockpile.
So the time it takes me to make one apron after a few years of practice is 45 minutes. I wish I knew a way to make it faster, but I don't think it's possible!

Other things that I include in my pricing are:
  • Cost of machines & equipment (computer, camera, serger, embroidery machine, sewing machine, printer)
  • Materials (fabric, velcro, magnetic snaps, etc.)
  • Advertising cost (Etsy fees, business cards, any craft fair fees)
  • Taxes (ugh)
  • PayPal Fees
  • Time for non-production things: Photographing items, answering emails, listing items, planning, ordering fabric, etc.
So if you do the math, you can see that a lot goes in to making an item. I hope this sheds better light on the handmade process and why prices are sometimes higher than you'd expect. We (crafters/artists) are not people who have production lines in China, able to spit out 50 items in one hour that cost $1. We are people who work in our homes, doing what we do because we love it and want to share it with others! Nothing makes us happier than sharing our talents with you!

Wednesday, November 9, 2011

Festive Christmas Aprons!

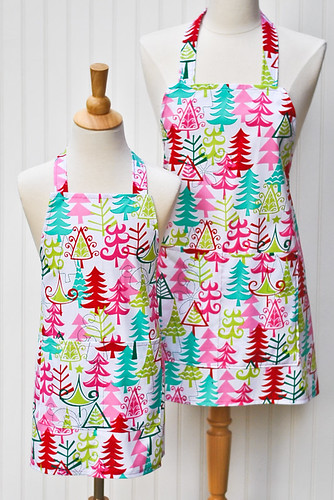
This year I’ve chosen a wonderfully festive print for my Christmas Aprons! Pink, red and green trees are popped all over a bright white background and are sure to bring some Christmas cheer to your holiday baking and entertaining! Available in both adult and child sizes, the aprons can be purchased individually (adult or child) or as a matching set. You can even add embroidery for a personalized touch!

Aprons-18

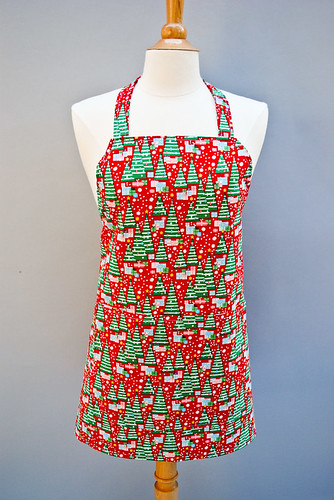
I also have three adult aprons left in the red fabric below. Get them while they last!

Bright Christmas Trees Adult Apron