Friday, June 24, 2011

Key Chain Clutches

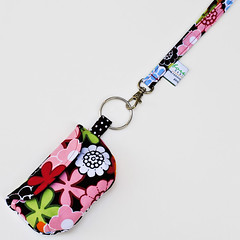
I just added a bunch of these to my shop! They can be purchased by themselves, with a wrist strap or with a lanyard. They are available in any of the fabric choices in my Flickr Set: Fabric Choices.

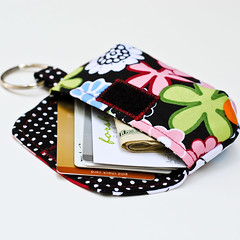
They are perfect for carrying cash, cards and will even fit a lipstick or lip balm in there with the cards! I like to use these when I go grocery shopping (especially going to Costco). I just put a lanyard around my neck with a Key Chain Clutch and go. Without having to take my purse in the store, I don't have to stay near my cart. I am free to move about! It's also convenient at checkout, especially if I'm using the self checkout.

Now for the photos!


2011 06 24 Keychain Clutch with Wristlet-3
Keychain Clutch with Wristlet in Mod Floral


2011 06 24 Keychain Clutch-2
Keychain Clutch in Mod Floral


2011 06 24 Keychain Clutch-12
Keychain Clutch, Back, in Cosmic Floral


2011 06 24 Keychain Clutch with Lanyard-9
Keychain Clutch with Lanyard in Black & White Hexagon


Pricing:
Clutch, $12.50
Clutch with Wrist Strap, $16.50
Clutch with Lanyard, $21.50

Wednesday, June 22, 2011

I Have Coffee Issues

It is no secret that I love coffee. Good strong coffee, mind you. While I do not hail Starbucks as the all-time master of coffee, I do appreciate that they are in every major city and that my addiction/habit/appetite can be whetted on demand almost anywhere I choose to roam. When planning a trip, I look up where the Starbucks stores are located before I go if I have never been there before.

When I visit Starbucks, there are only a few drink options for me there: Drip coffee (as long as it’s a bold coffee and especially NOT that nasty Pike Place Blend), Americano (I started drinking this when they decided to only have a bold choice until noon or so--that’s another story), or if I’m feeling strange, a Latte, straight espresso or Iced Coffee. I do not drink the frozen things or teas or anything sugary. To my drip or Americano, I will add 1 raw sugar and some cream. To the latte or espresso, I add nothing. To the iced, 1 Splenda and cream. I am very specific about my coffee and I will have it no other way. Yes, Mr. Barista, I can tell when you put more sugar than I asked for. It makes my teeth feel yucky and makes the onset of diabetes that much earlier for me. I do not appreciate this. I said ONE raw sugar, not one handful.

At home, I own all the coffee makers a girl could desire: A drip coffee machine, an espresso machine and a French press. I use the drip machine most often because it’s convenient, but the press is by far my favorite. Now that I have it, the espresso machine is sort of obsolete because the press can make espresso. But it can’t steam milk like the espresso machine. I keep the espresso machine because I like to say that I have one. I hardly use the thing.

THE BEANS: Oh my. I like a nice dark roast. However, I am also a fanatic about saving money. Or not spending so much if I don’t have to. Anyway, I have been surprisingly pleased with the Costco brand House Blend (which is roasted by Starbucks--Starbucks is like WalMart. No matter how much you try to get away, you still find yourself there in some way.). It is not as dark as I like, but I compensate for that by using more beans. FRESHLY GROUND BEANS, people. Do yourself a favor and go buy a $20 coffee grinder. Grind your coffee at home each time you want to make coffee. I ground some beans about 12 hours ahead of time once and it was gross. I am THAT good. I notice these things. Pre-ground or that stuff that they vacuum seal into a brick is no good.

This whole post resulted from me stating on Facebook AS FACT that my iced coffee I make at home is better than any Starbucks Barista could make. It’s true. I’ve been asked to share my “recipe.” Ladies and germs, I don’t have a recipe. I don’t even cook with them in general. Again, I am THAT good. I do bake with them since baking requires them.

So here’s what I do:
1. Spoon about 7 heaping tablespoons of coffee beans into your coffee grinder.
2. Grind to a medium--not coarse, not fine, MEDIUM. Just like you would grind for regular drip coffee. I would rather you grind too much than not enough, though.
3. Dump the whole thing into your coffee filter and put it in the filter basket.
4. Fill the reservoir of your drip coffee maker with about 17 oz of water. Here, I would like for you to err on the side of less water than more water.
5. Turn on the coffee maker. It will now make you some coffee.
6. While the coffee maker is working, fill your favorite cocktail shaker with ice. I like mine from Pampered Chef. It’s double walled and fabulous.
7. Then fill your favorite BIG cup 1/2 full of ice or frozen coffee cubes. I do some of each. Here's mine, complete with Buzz (Go Jackets!) & a pink straw:
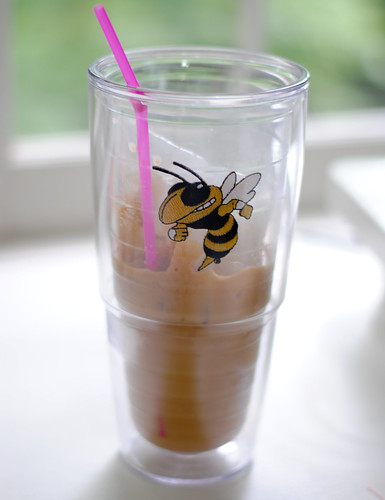

2011 06 22 Coffee Issues-1

8. Now that your coffee is ready, pour some over the ice in the shaker with whatever sweetener you want. I don’t use regular sugar in iced coffee so I don’t know if it will dissolve properly. Shake it until the ice is almost melted. Oh, put the lid on first before you start shaking!
9. Pour the now-chilled coffee over the ice in your favorite big cup. Keep doing step 8 & 9 until your big cup is full. Top with some half & half or whatever.
10. Now, you drink the iced coffee. After you have finished, come back here and leave a comment thanking me for this goodness that now resides in your big cup! You’re welcome, in advance, of course!
Monday, June 13, 2011

Lazy Girl Patterns--Chelsea Backpack Tote--Pattern Review

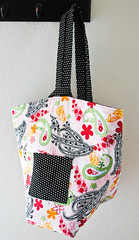
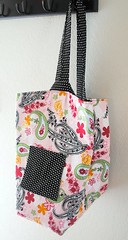
A friend of mine has a toddler and is in between the diaper bag/no diaper bag stage, and she requested that I make her a backpack with one strap to serve her toddler stuff-carrying purposes. I scoured the internet for patterns and we decided that the Chelsea Backpack Tote by Lazy Girl Designs would be the best option.

I love Lazy Girl’s patterns because they make sense to me. They are never anything fancy, just straightforward patterns with clear “why didn’t I think of doing it that way” instructions.

The only things I don’t like about the patterns is the tendency to leave raw edges exposed and the way the handles are attached. I ALWAYS modify those two things. To me, when making bags, even finishing an edge with a serger is sloppy. I like everything to be encased for a clean look. Now, Lazy Girl’s patterns don’t always leave serged seams exposed. Most of Lazy Girl’s bags are large and lend themselves to be able to carry a lot of stuff. The pattern instructions rely on stitching the handles to the outside with only two rows of straight stitching after the body of the bag is completed. I attach the handles to the inside by stitching over them about 10 times, then turning the bag right side out, and then I topstitch over the opening of the bag for another row of stitching. That’s 11 times that I stitch over bag handles.

**Stepping down from soapbox.**

I didn’t time myself on how long it took my to make this bag. I sort of worked on it over the course of 3 distracted days in which I didn’t get a lot done. I’m guessing it took about 2 hours.

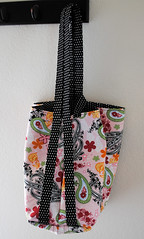
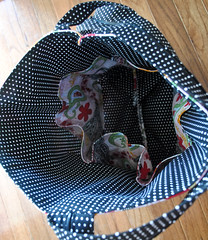
I LOVE that this backpack has a zippered handle. It can be worn either with one strap or two straps! I also added a nice, large gusseted (for a sippy cup) pocket to the row of interior pockets. The bag itself is very roomy and I love the square bottom.

Overall, with my modifications, I love the way this bag turned out! I hope that my friend does too!


2011 06 13 Lazy Girl Chelsea Tote-1


2011 06 13 Lazy Girl Chelsea Tote-2
2011 06 13 Lazy Girl Chelsea Tote-3
2011 06 13 Lazy Girl Chelsea Tote-4

Tuesday, June 7, 2011

Personalized Zippered Pouches

I made these pouches last week for an Etsy customer. These were for her children's teachers. I thought it was such a sweet gift!


2011 06 04 Large Matching Zippered Pouches-1

2011 06 04 Large Matching Zippered Pouches-2

Saturday, June 4, 2011

NEW! Ruffled Tote

I was wandering around in Whipstitch Fabrics last week, looking for something to strike my fancy and I found this blue and green fabric! But what could I make with it? I decided to grab some coordinating Kona Celery Green and see what came of it when I got home. On the way home, I decided to make a tote with some ruffles. Now, I had forgotten how long it takes for me to make a ruffle. I didn't have a ruffler foot and I dislike making them with a machine basting stitch. I always felt the basting stitch was still too short to do this easily. So, I did the ruffles by hand this time. Then I vowed to never do that again and I bought a ruffler foot for my Janome. Anyway, here are the photos! It is also listed in my shop! I will definitely be making more of these for my shop in other fabrics.

The Details:
~14" wide x 17" tall x 3" deep
~Straps measure approximately 22" each
~Price $31.50 plus applicable tax & shipping


2011 06 04 Ruffled Tote-2
Tote Bag with Ruffles